Home Appliance Diy
Hotpoint Indesit dryer burning smell
If there is signs of burning then give the manufacturer a ring ,they take these faults very seriously.You may get a free repair or more.
 |
I ALWAYS UNPLUG FROM MAINS.
Remove 2 screws from lid (shown in picture.) |
Push lid ( as shown in diagram ) until it moves back then lift lid.It can be very tight and can need a hard push. |
 |
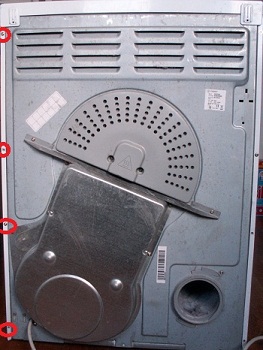 |
Remove the four screws as shown in the picture to the left. Then remove the two screws at the top of the side panel as shown in picture below. |
Remove the two screws at the top of the side panel. |
 |
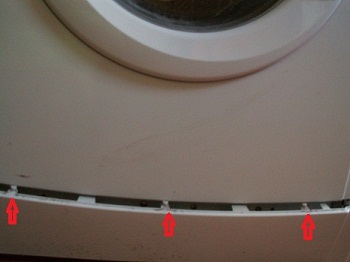 |
Remove the plynth by inserting a small flat bladed screwdriver in the 3 places as shown in the picture and slightly lift up to release the 3 clips (one at a time ) then the plynth can be released from the lower clips (The lower clips can be tight and soon break). |
Remove the 2 screws as shown in the picture ( some of the models have a screw underneath shown by the arrow).The side panel slides back and can be removed . |
 |
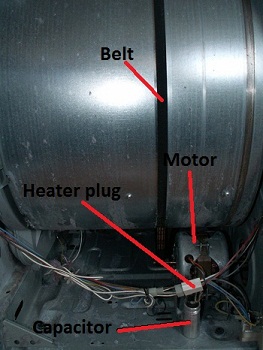 |
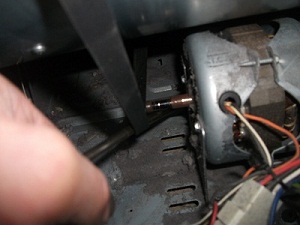
The insides can now be seen .Unplug the heater plug as shown in the picture . Remove any tie wraps on the heater wires, and loosen the belt. |
Remove the 2 screws from the rear cover. |
 |
 |
Remove the pin in the drum shaft. |
| The rear panel can then be prised apart to allow the drum to be removed and excess fluff can be removed. |
 |
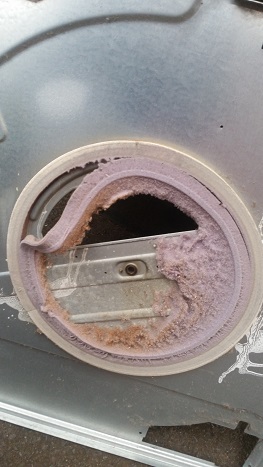 |
Inspect the rear seal and remove any excess fluff. |
| Refit the belt as shown |
 |
|
.Unplug the heater plug as shown in the picture . Remove any tie wraps towards the rear of the machine. |
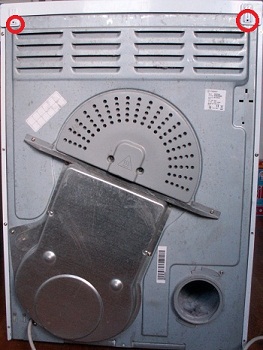
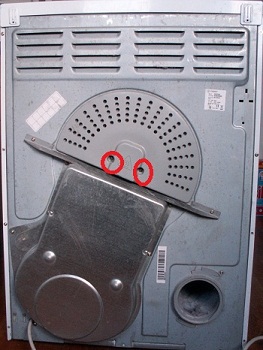
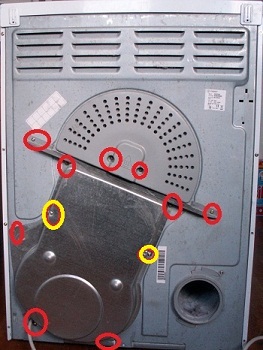
| Remove the screws from the heater cover (There are 2 small screws where the yellow circles are these hold the heater in place
DO NOT RELEASE YET . Then using a flat bladed driver prise the cover away from the rear panel to remove the heater cover and heater (mind the heater |
 |
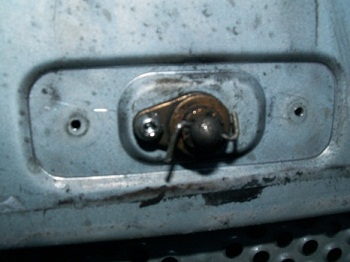
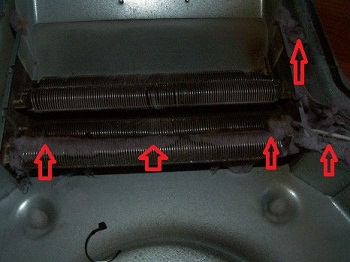
| Chect the heater and remove any access fluff. |
 |
If you cannot find what you are looking for or need help then just drop me a message at Appdiy@yahoo.co.uk.